马上注册,加入CGJOY,让你轻松玩转CGJOY。
您需要 登录 才可以下载或查看,没有帐号?立即注册

×
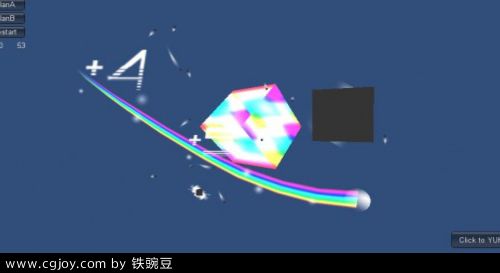
开发环境 Window7 Unity3D 3.4.1 MB525defy Android 2.2.1 虽然标题是游戏开发,其实也是羽化测试鼠标和弹幕的时候做的一个小游戏,于是一点点有模有样了,至于为什么又是方块,囧!所以就分享出来,内容很简陋,代码很简单,先送上效果截图。。。Android中PlanA是二刀流版- -大家凑合看吧-0-

本次学习: 1. 弹幕追踪简单AI 2. Unity鼠标特效
1. 弹幕追踪简单AI 群里面有人共享的一个网页弹幕代码,通过XML控制,做得真的很不错,这里的弹幕AI很简单,可以用到很多飞行游戏中,如果想做出花哨的子弹轨迹效果,这个要花很多时间在上面钻研了,这里的代码只能实现前期的轨迹与方位追踪。希望能给大家参考~ ~ Boss.js - var target : Transform;
- var speed : float = 4.0;
- var LookAt : boolean = true;
- var go : boolean = false;
- private var mx : float;
- private var my : float;
- private var mz : float;
- private var dis : float;
- private var save : Vector3;
- private var time : int;
- function Start()
- {
- save = transform.position;
- dis = Random.value * 8- 4;
- mx = Random.value * 8 - 4;
- my = Random.value * 8 - 4;
- mz = Random.value * 8 - 4;
- time = 30 - Random.value*30;
- yield WaitForSeconds (time);
- go = true;
- }
- function Update ()
- {
- if(go)
- {
- if(Vector3.Distance(target.position, transform.position) > 5 && LookAt)
- {
- transform.LookAt(target.position);
- }
- else if(Vector3.Distance(target.position, transform.position) < 5)
- {
- LookAt = false;
- Destroy(gameObject,2);
- }
- transform.Translate(Vector3.forward * Time.deltaTime*speed);
- }
- else
- {
- transform.RotateAround(Vector3(mx,my,mz),save + Vector3(mx,my,0),Time.deltaTime * speed * dis);
- }
- }
2. Unity鼠标特效
上篇提过鼠标特效的事情,于是羽化就做了测试,由于现在公司游戏主攻Web端,手机端在此之上删减,所以操作性质就发生了改变,但羽化还是写了手机端的代码,还是二刀流- -,图片从晚上找的,这里提供了两种鼠标特效,当然在真正做的时候羽化估计会用第二种加强版,所以看大家的平台和需求来。 MOUSE.js - var target1 : Transform;
- var target1C : Transform;
- var target2 : Transform;
- var target2C : Transform;
- var mousePos1 : Vector3;
- var mousePos2 : Vector3;
- var cursorImage : Texture;
- var Mouse : GUISkin;
- private var MouseImg : boolean = false;
- function Update()
- {
- if(Application.platform == RuntimePlatform.Android || Application.platform == RuntimePlatform.IPhonePlayer)
- {
- if(Input.touchCount == 1)
- {
- mousePos1 = Input.touches[0].position;
- }
- else if(Input.touchCount == 2)
- {
- mousePos1 = Input.touches[0].position;
- mousePos2 = Input.touches[1].position;
- }
- }
- else
- {
- mousePos1 = Input.mousePosition;
- }
- target1.position = camera.ScreenToWorldPoint (Vector3(mousePos1.x,mousePos1.y,1));
- target2.position = camera.ScreenToWorldPoint (Vector3(mousePos2.x,mousePos2.y,1));
- }
- function LateUpdate()
- {
- if(Input.GetKey(KeyCode.Escape))
- {
- Application.Quit();
- }
- }
- function OnGUI()
- {
- if(MouseImg)
- {
- GUI.skin = Mouse;
- var windowRect : Rect = Rect (mousePos1.x - cursorImage.width/2, Screen.height - mousePos1.y - cursorImage.height/2, cursorImage.width, cursorImage.height);
- windowRect = GUI.Window (0, windowRect, DoMyWindow, "My Window");
- }
- if(GUILayout.Button("PlanA"))
- {
- Screen.showCursor = !Screen.showCursor;
- target1.gameObject.active = !target1.gameObject.active;
- target1C.gameObject.active = target1.gameObject.active;
- if(Application.platform == RuntimePlatform.Android || Application.platform == RuntimePlatform.IPhonePlayer)
- {
- target2.gameObject.active = !target2.gameObject.active;
- target2C.gameObject.active = target2.gameObject.active;
- }
- }
- else if(GUILayout.Button("PlanB"))
- {
- Screen.showCursor = !Screen.showCursor;
- MouseImg = !MouseImg;
- }
- else if(GUILayout.Button("Restart"))
- {
- Application.LoadLevel(0);
- }
- if(GUI.Button(new Rect(Screen.width-120,Screen.height-40,120,30),"Click to YUHUA!"))
- {
- Application.OpenURL("http://blog.csdn.net/libeifs");
- }
- GUI.color = Color.white;
- GUILayout.Label("fps:" + FPS.fps.ToString("f0") + " " + FPS.afps.ToString("f0"));
- }
- function DoMyWindow (windowID : int)
- {
- }
这里第二种替换图片,羽化用的是GUI中的Window,因为Window可以改变层级,大家研究下就知道,事件可以按需求自己判断。若大家有什么更好的点子,希望与羽化交流~ ~ 至于消除,碰撞什么的,羽化前面的博客里面都介绍过,大家可以参考下~ ~
老样子工程送上: http://dl.dbank.com/c00te8j9aq
原文链接:http://blog.csdn.net/libeifs/article/details/6857067
|  加载中...
